> ## Documentation Index
> Fetch the complete documentation index at: https://docs.piebald.ai/llms.txt
> Use this file to discover all available pages before exploring further.
> Use Slack's remote MCP server in Piebald.
# Slack
To use Slack's [official MCP server](https://docs.slack.dev/ai/slack-mcp-server/) inside Piebald, you'll need to make a Slack app inside the workspace you're going to log in with. Then, you can add Slack as an HTTP MCP server with a custom OAuth Client ID.
1. Go to [https://api.slack.com/apps](https://api.slack.com/apps).
2. Click **Create an App** (or **Create New App**).
3. Choose **From a manifest**.
4. Choose the workspace you'll be using the MCP server with, and click Next.
5. Paste the following into the **JSON** tab of the dialog, inside the code editor, replacing all existing text:
```json theme={null}
{
"display_information": {
"name": "Piebald",
"description": "The ultimate agentic AI control experience for developers.",
"background_color": "#2c2d30",
"long_description": "Piebald is a desktop & web app that makes it easier than ever to do agentic development, while at the same time giving you complete control over the configuration, context, and flow, all from a powerful desktop & web UI that runs on macOS, Windows, and Linux."
},
"oauth_config": {
"redirect_urls": [
"https://piebald.ai/desktop/redirect"
],
"scopes": {
"user": [
"canvases:read",
"canvases:write",
"channels:history",
"chat:write",
"groups:history",
"im:history",
"mpim:history",
"search:read.files",
"search:read.im",
"search:read.mpim",
"search:read.private",
"search:read.public",
"search:read.users",
"users:read",
"users:read.email"
]
},
"pkce_enabled": false
},
"settings": {
"org_deploy_enabled": false,
"socket_mode_enabled": false,
"token_rotation_enabled": false
}
}
```
6. Click **Next**.
7. You should be presented with a **Review summary & create your app** dialog. Click **Create**.
8. From the **Features** section in the left-hand sidebar, go to **OAuth & Permissions**.
9. In the **Proof Key for Code Exchange (PKCE)** section, click the **Opt In** button.
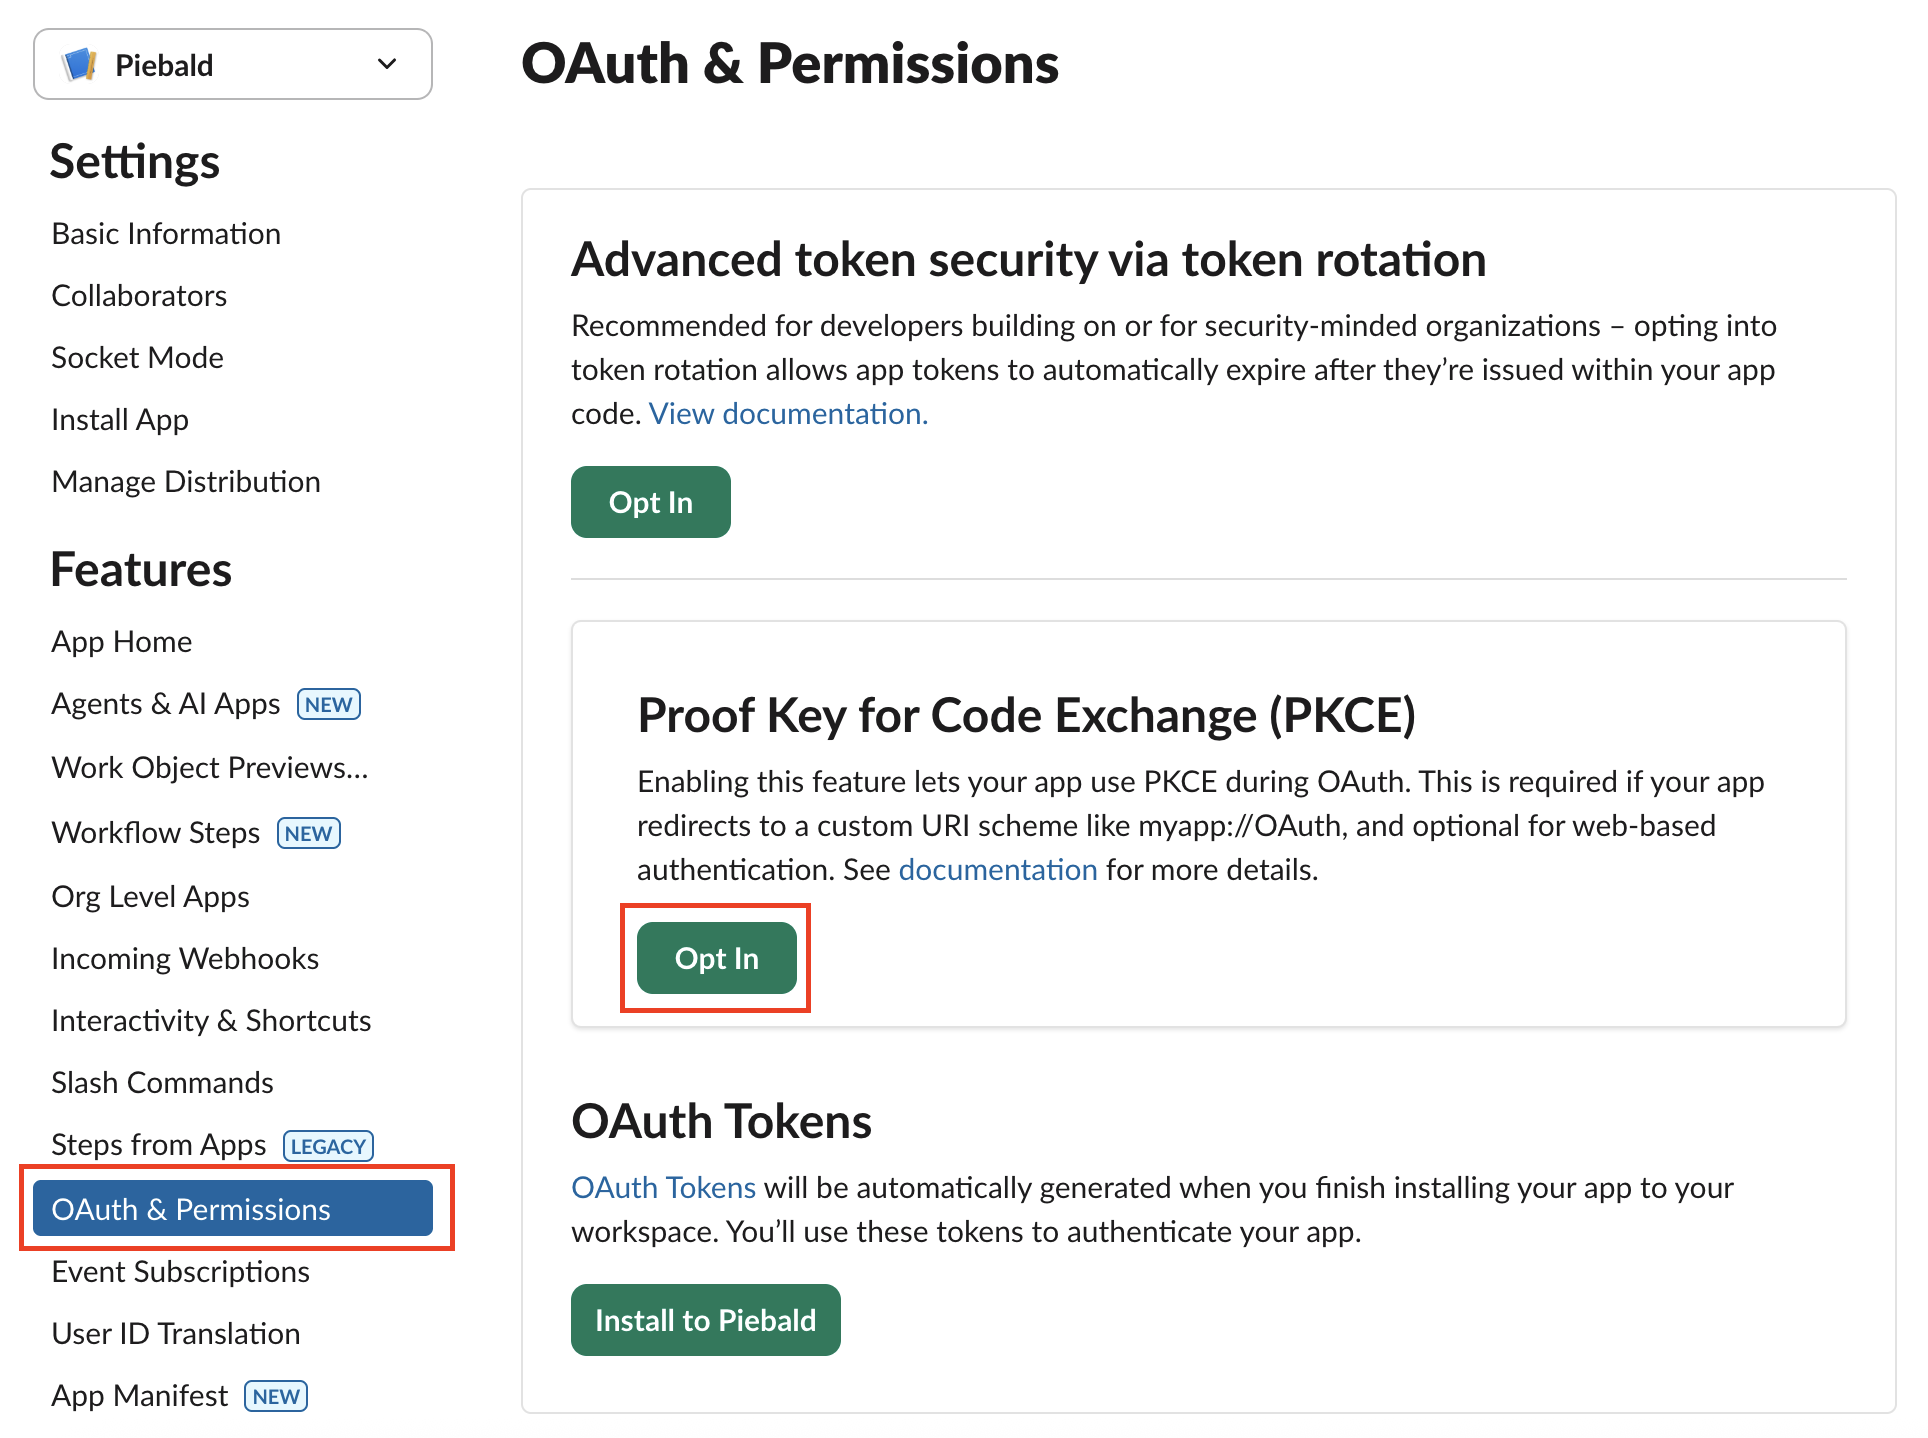 8. You should be prompted again to permanently enable PKCE. Click **Opt In**.
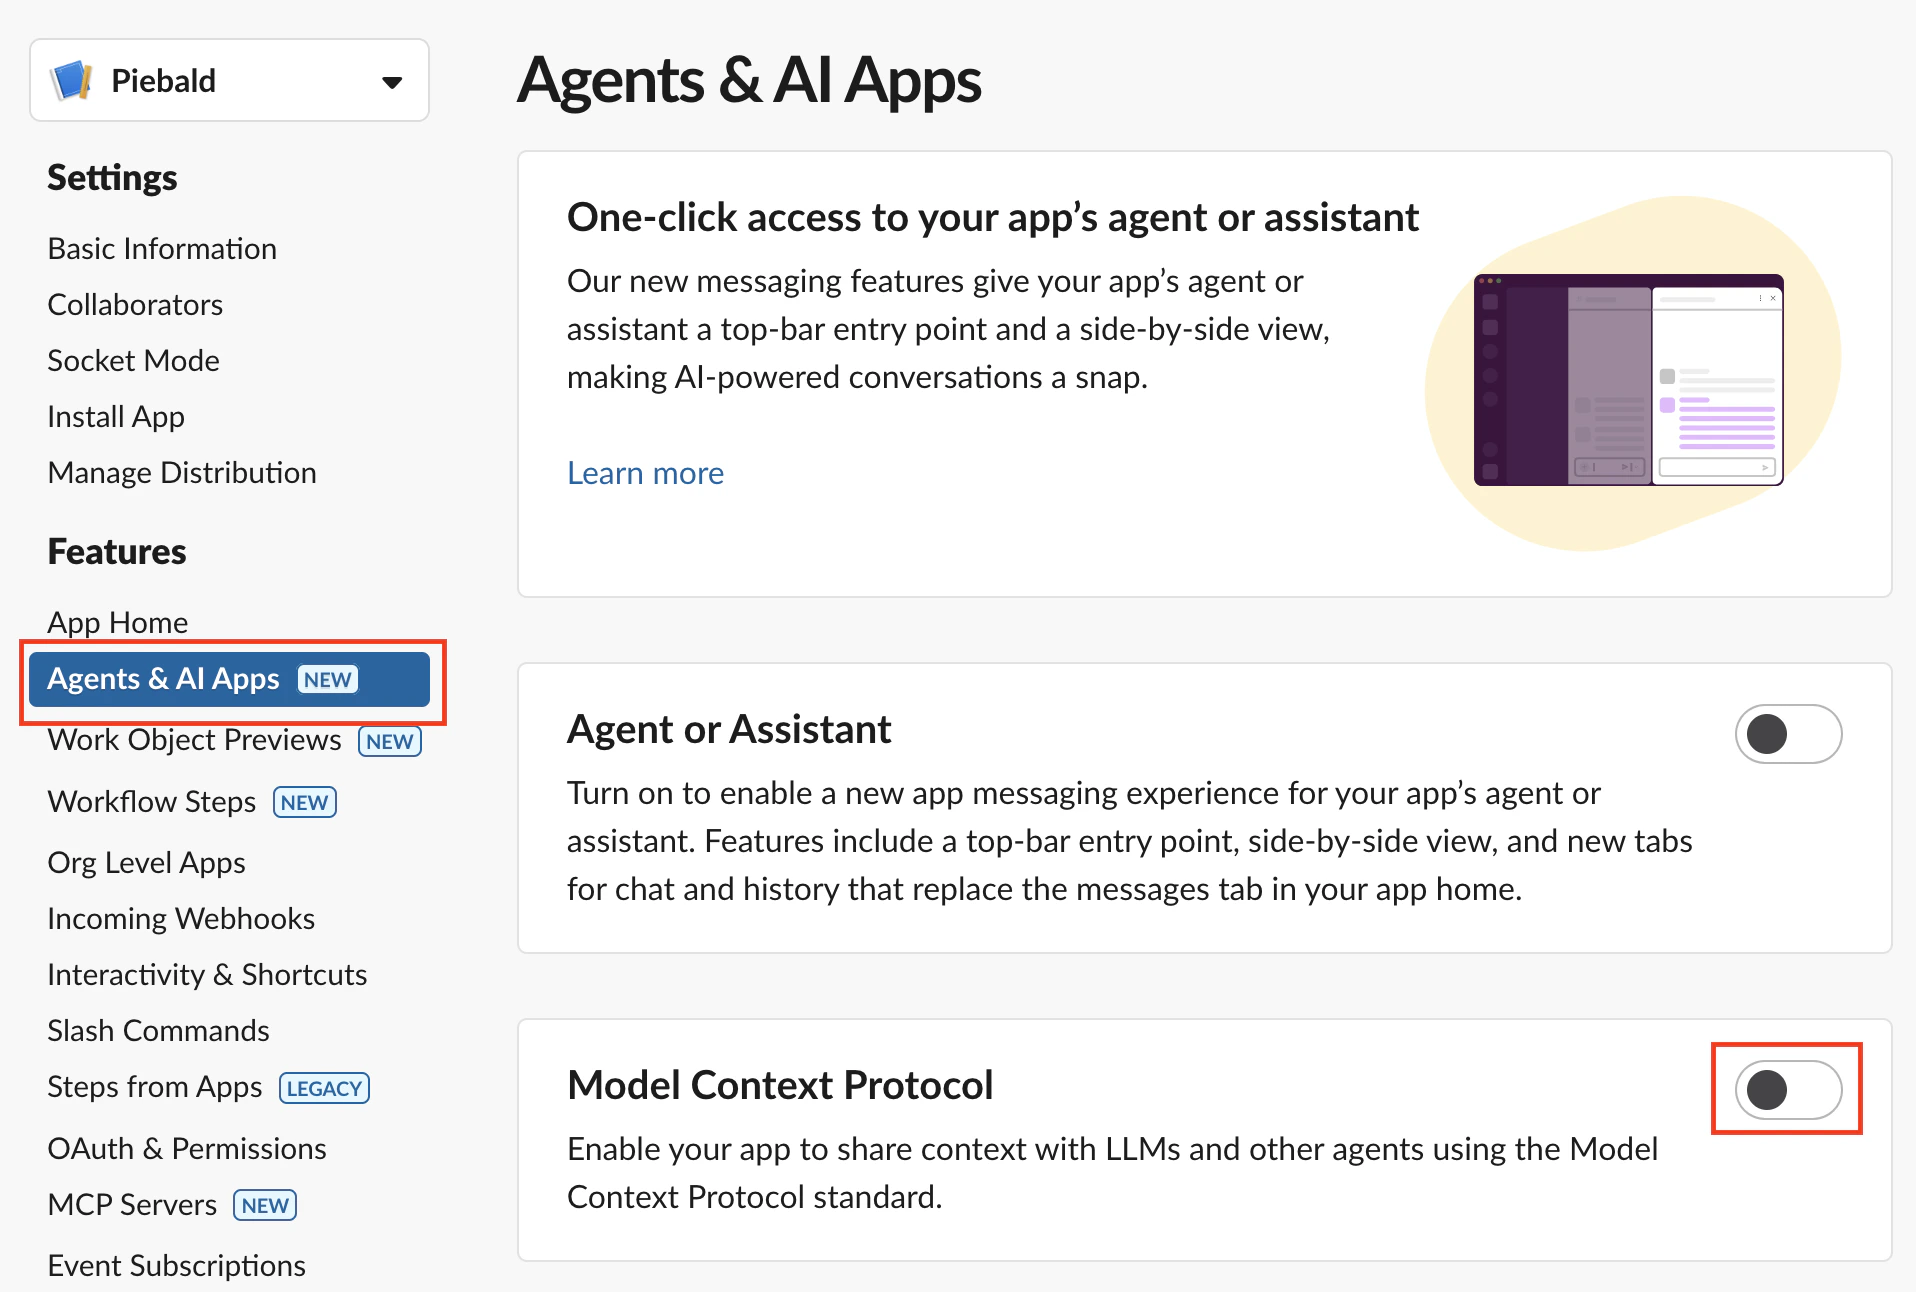
9. From **Features** in the sidebar, go to **Agents & AI Apps**.
10. Enable **Model Context Protocol**.
8. You should be prompted again to permanently enable PKCE. Click **Opt In**.
9. From **Features** in the sidebar, go to **Agents & AI Apps**.
10. Enable **Model Context Protocol**.
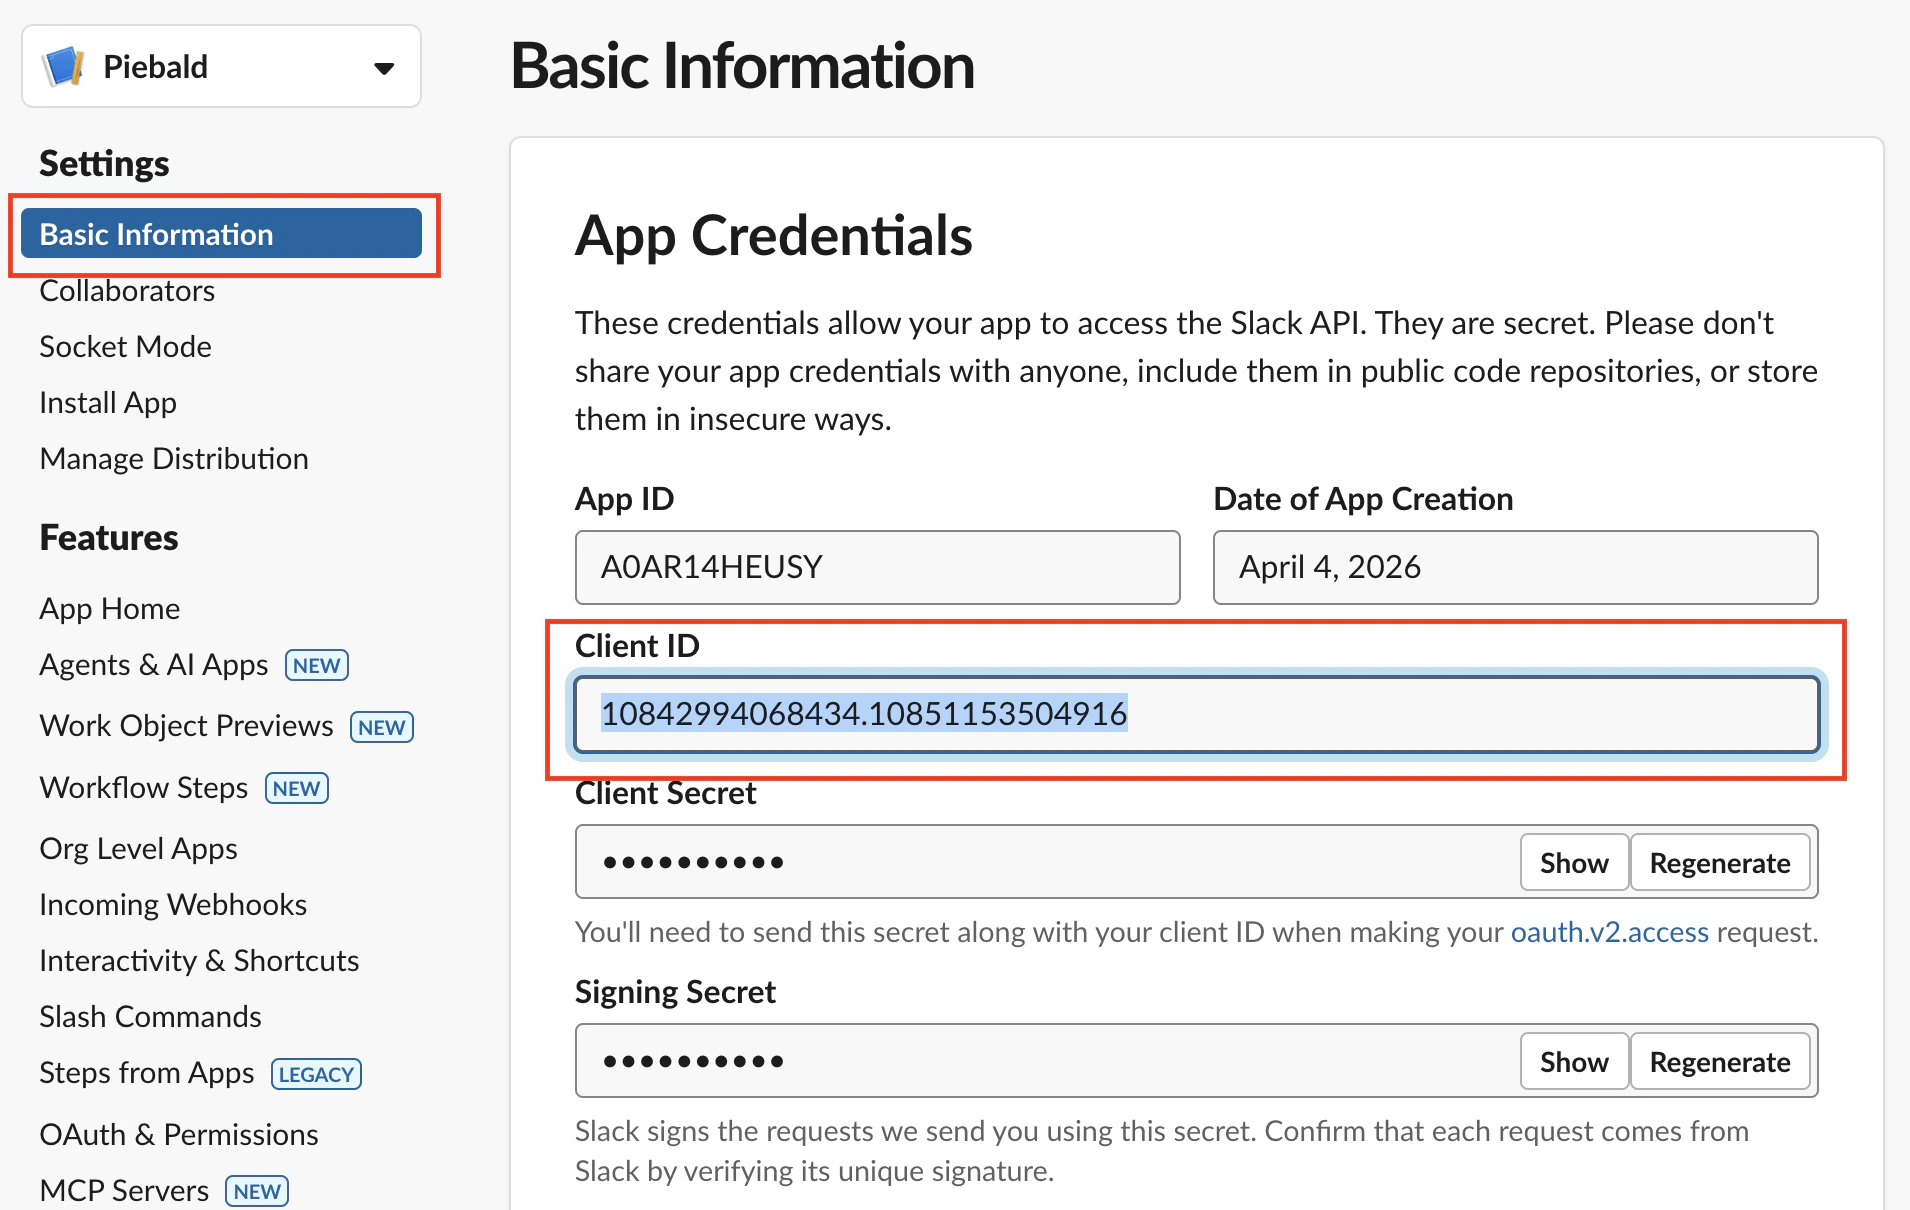
 11. From the **Settings** section in the sidebar, go to **Basic Information**.
12. Copy the value of the **Client ID** input box.
11. From the **Settings** section in the sidebar, go to **Basic Information**.
12. Copy the value of the **Client ID** input box.
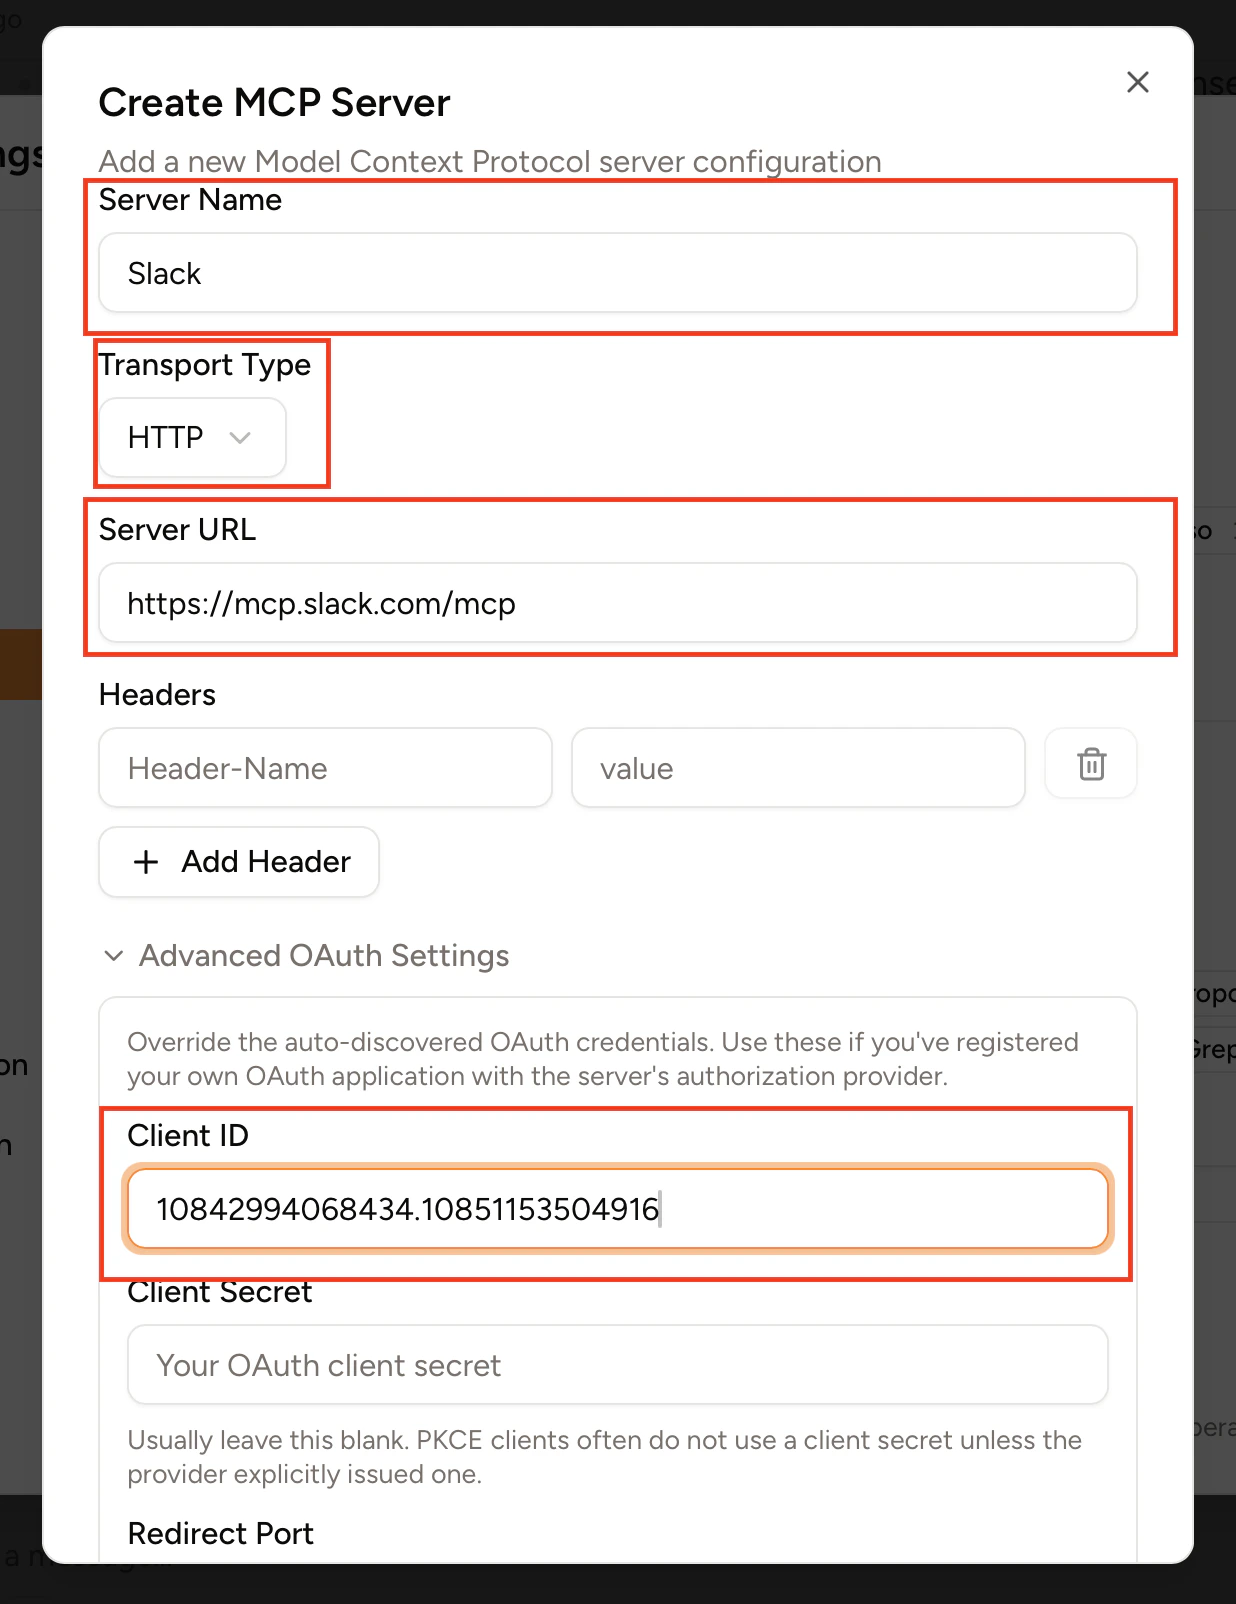
 13. In Piebald, go to **Settings → MCP Servers** and click **Add → Add Server**.
14. Enter a name for the MCP server (e.g. **Slack**).
15. For **Transport Type**, select **HTTP**.
16. Enter `https://mcp.slack.com/mcp` as the Server URL.
17. Expand **Advanced OAuth Settings**, and then paste the Client ID you copied from Slack into the Client ID input box.
13. In Piebald, go to **Settings → MCP Servers** and click **Add → Add Server**.
14. Enter a name for the MCP server (e.g. **Slack**).
15. For **Transport Type**, select **HTTP**.
16. Enter `https://mcp.slack.com/mcp` as the Server URL.
17. Expand **Advanced OAuth Settings**, and then paste the Client ID you copied from Slack into the Client ID input box.
 17. Click **Create & Authenticate** at the bottom of the dialog.
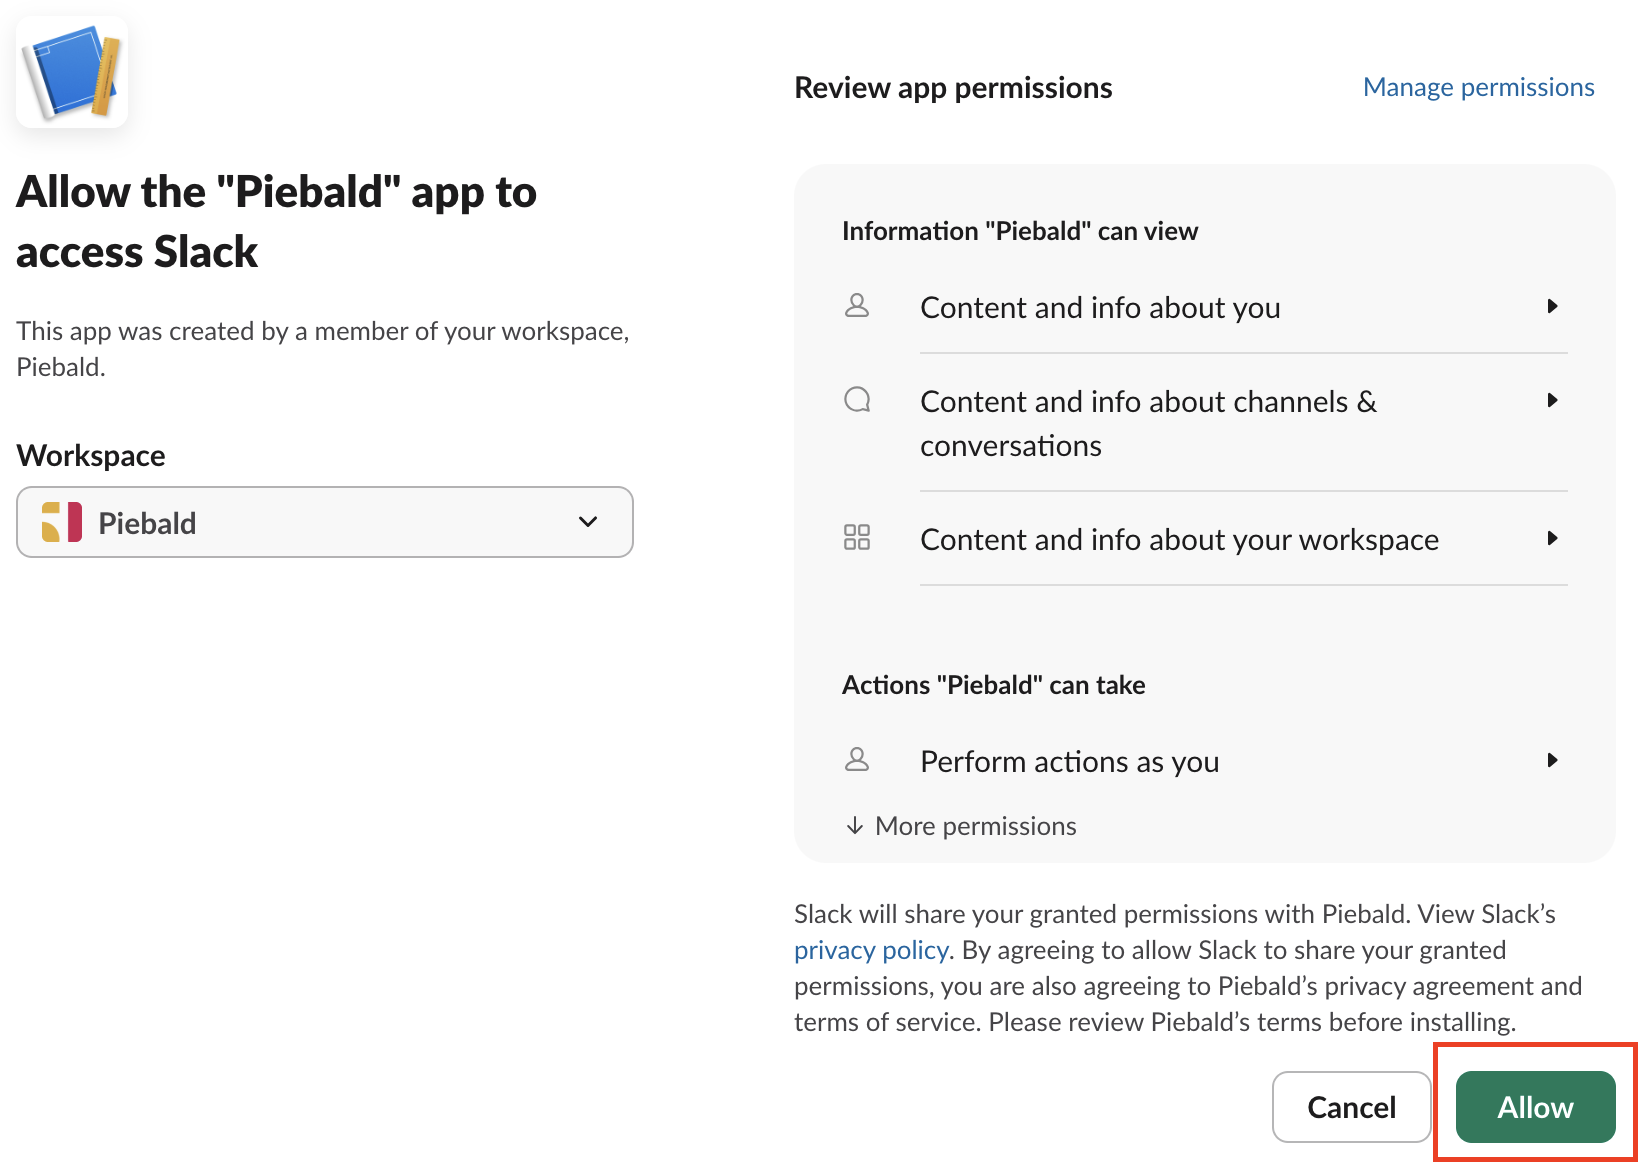
18. After a few seconds, a browser tab should open, be prompting you to allow Piebald to access Slack. Click **Allow**.
17. Click **Create & Authenticate** at the bottom of the dialog.
18. After a few seconds, a browser tab should open, be prompting you to allow Piebald to access Slack. Click **Allow**.
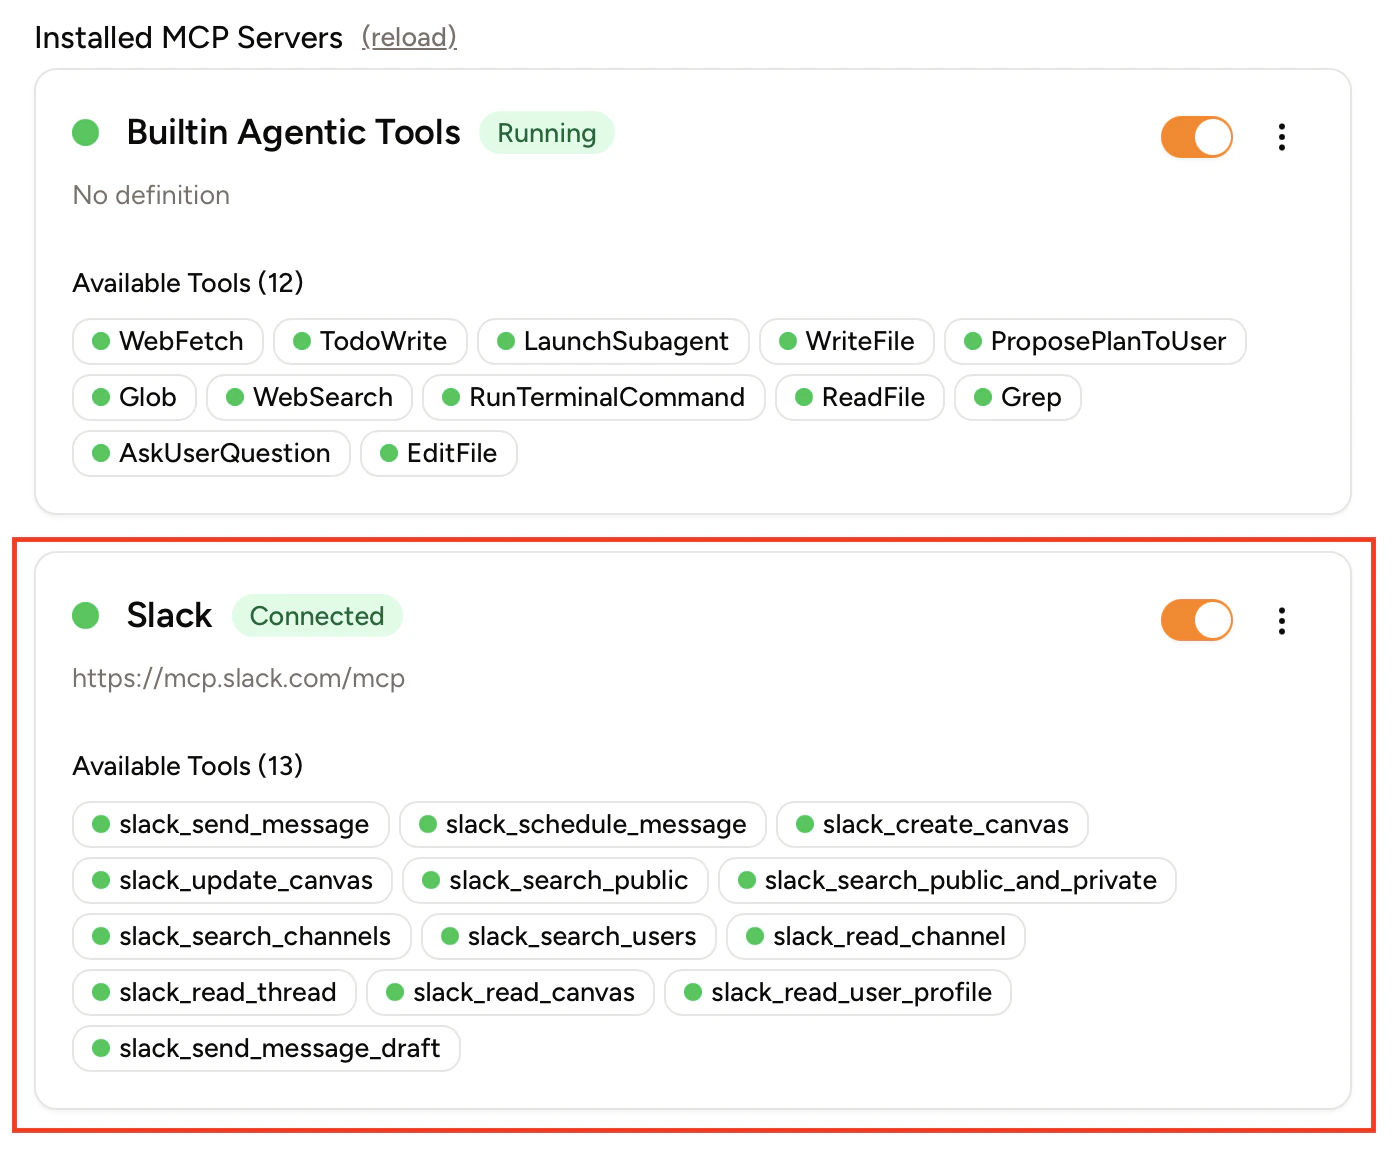
 19. Return to Piebald, and check that the MCP server is green:
 20. Close the Settings dialog.
You should now be able to use the Slack MCP server!
20. Close the Settings dialog.
You should now be able to use the Slack MCP server!