mcp:connect OAuth scope. Unfortunately, Figma’s developer UI doesn’t display that scope, so you’ll need to use a workaround and add it manually by replaying the app update request from your browser’s DevTools.
Make sure to save the Client Secret when Figma shows it; it’s necessary for Figma MCP
server OAuth and is only shown once.
- Go to https://www.figma.com/developers/apps.
-
Click Create a new app.

- Enter a name for the app.
- Select an owner.
- Click Create app.
-
Copy the Client ID, and save the Client Secret.
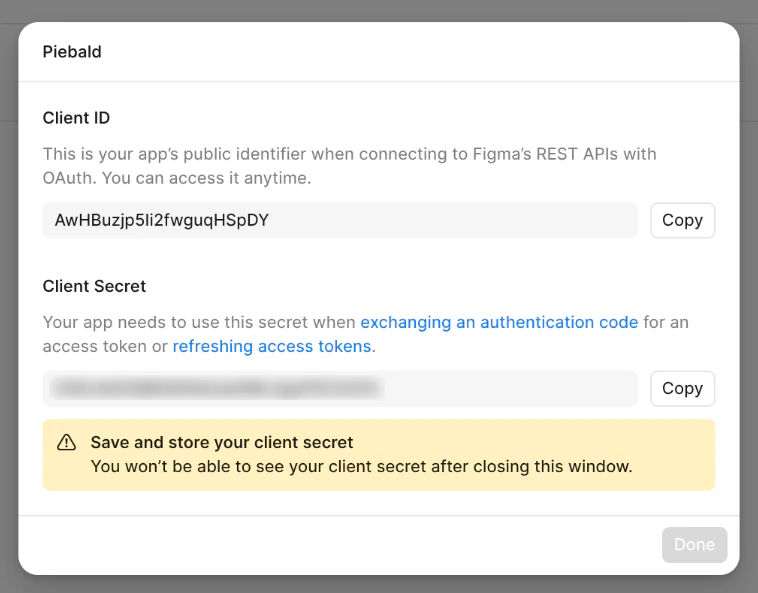
- Click Done.
- In the configuration dialog that should automatically open, go to OAuth credentials in the left-hand sidebar.
- Under Redirect URLs, click Add a redirect URL.
-
Enter
https://piebald.ai/desktop/redirectand click Add.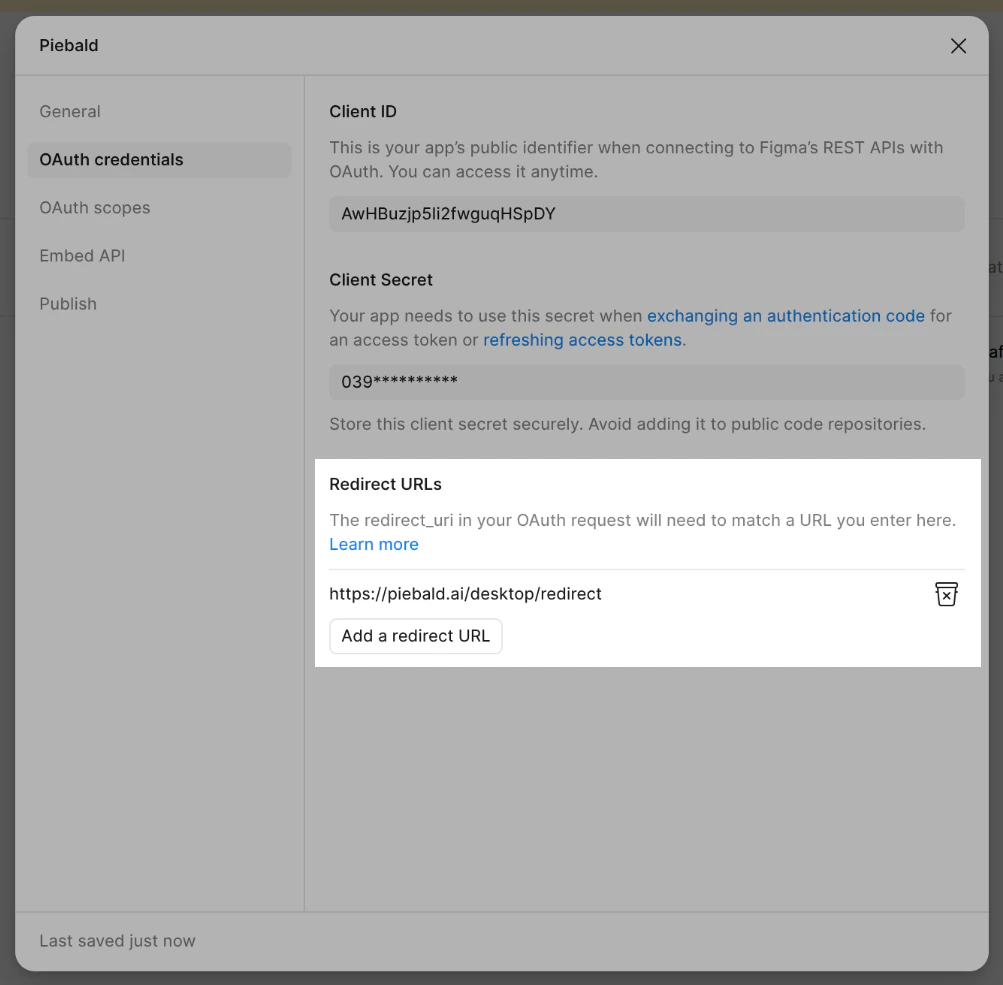
- Go to OAuth scopes in the left-hand sidebar.
- Open your browser’s DevTools, and go to the Network tab.
-
Enable any random scope, such as Users →
current_user:read.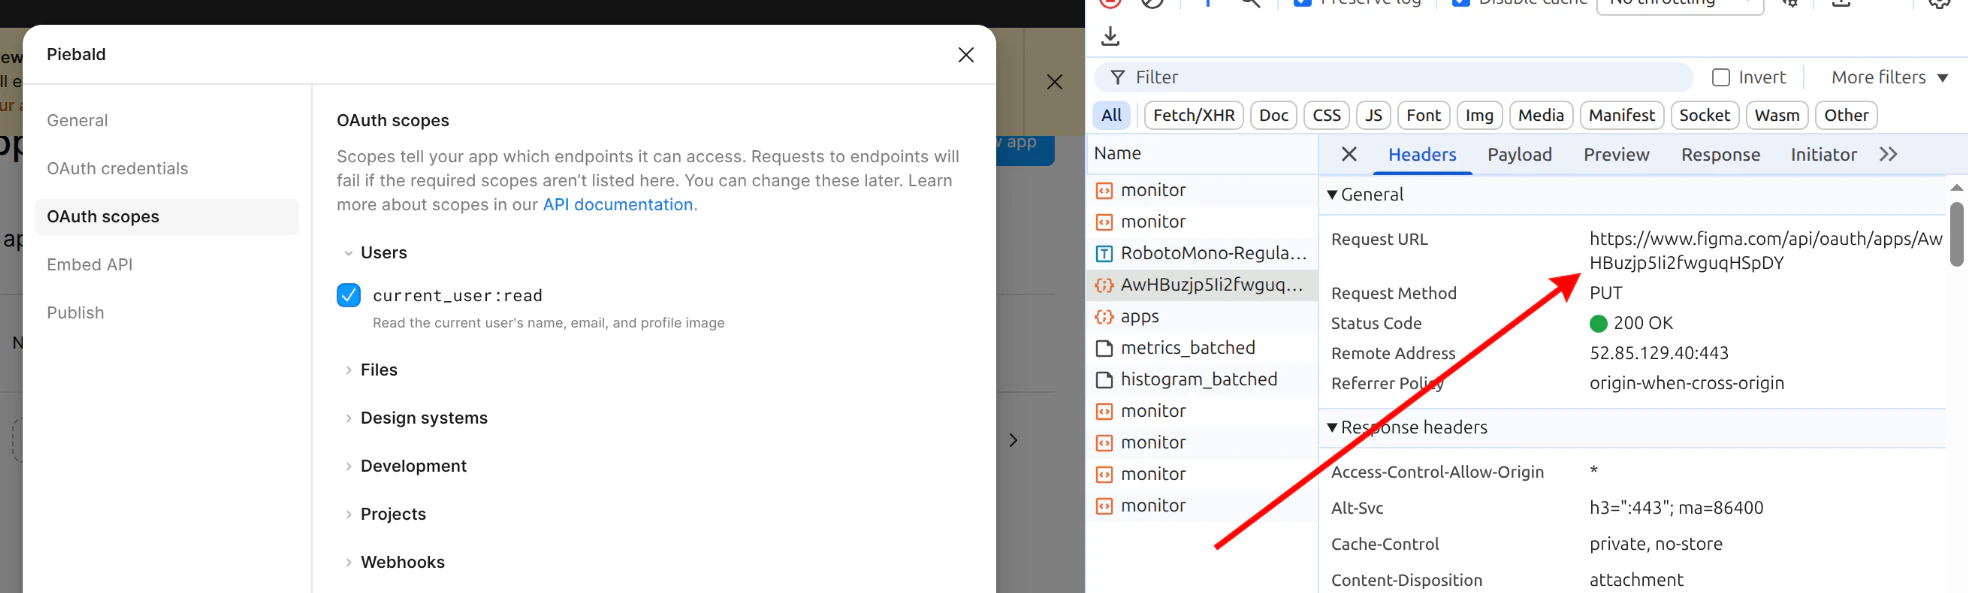
-
In the Network tab, find the update request. The URL should look like
https://www.figma.com/api/oauth/apps/<client-id>. - Copy the request as cURL.
-
Change the scope in the request body to
mcp:connect. -
Send the request. For cURL, execute the modified command.
 Some values in the cURL command were truncated for brevity in the screenshot above; the actual command will be much larger.
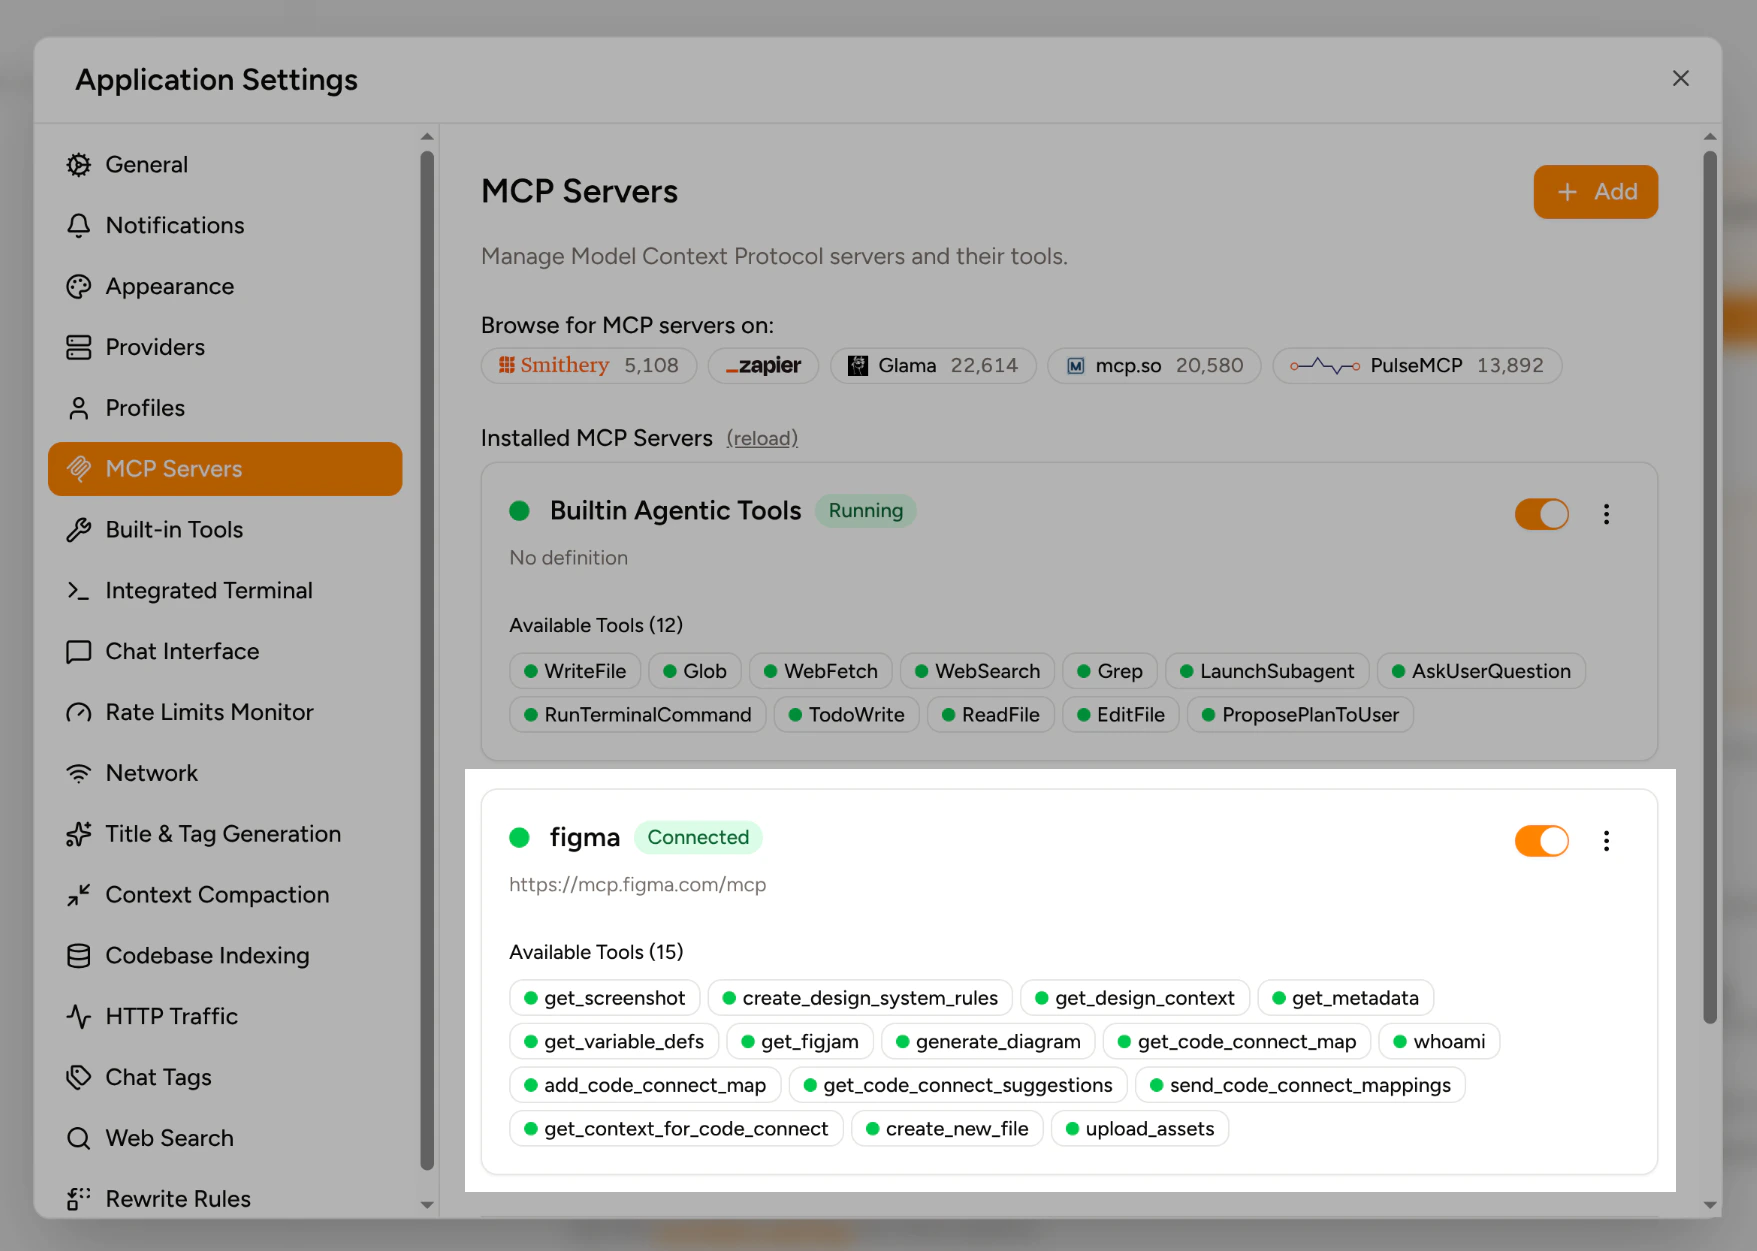
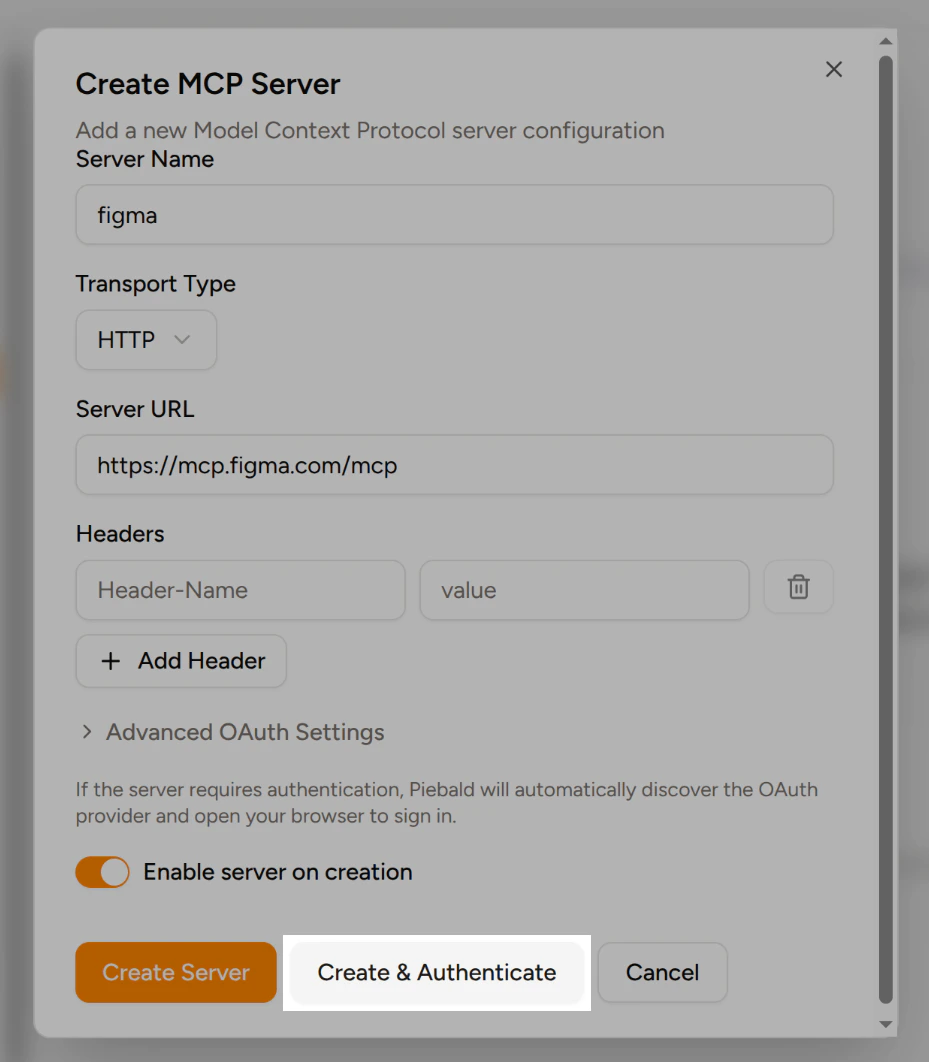
 - In Piebald, go to Settings → MCP Servers and click Add → Add Server.
-
Enter a name for the MCP server, such as
figma. - For Transport Type, select HTTP.
-
Enter
https://mcp.figma.com/mcpas the Server URL. -
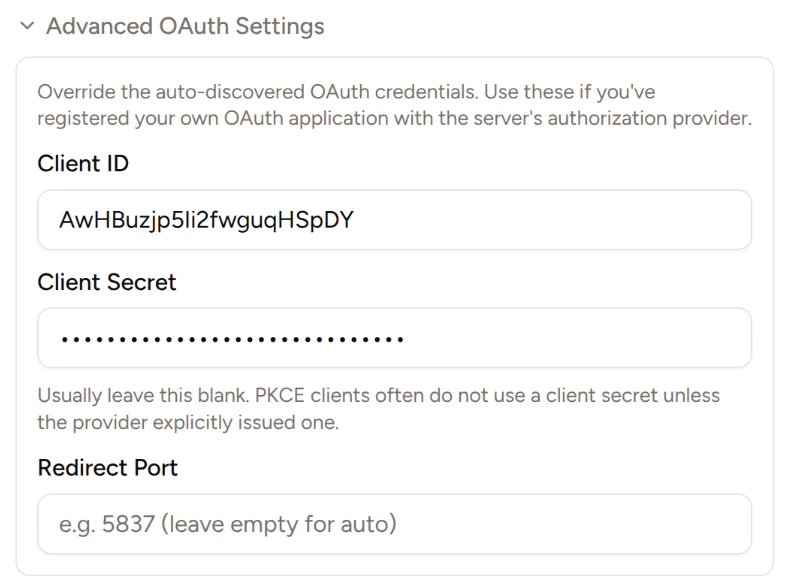
Expand Advanced OAuth Settings, then paste the Client ID and Client Secret from your Figma app.
-
Click Create & Authenticate at the bottom of the dialog.
- Complete the Figma authorization flow in your browser.
-
Return to Piebald, and check that the MCP server is green.