

Available in Piebald Basic (Free) In addition to local MCP servers that run on your machine, Piebald also supports remote MCP servers (also known as HTTP MCP servers). To add a new remote MCP server:Documentation Index
Fetch the complete documentation index at: https://docs.piebald.ai/llms.txt
Use this file to discover all available pages before exploring further.
- Go to Settings → MCP Servers.
- Click Add → Add Server.
- Enter a name.
- For Transport Type, select HTTP.
- Enter the MCP server URL (e.g. for Context7,
https://mcp.context7.com/mcp). - If the server requires authentication, and you want to authenticate immediately, click Create & Authenticate; otherwise, click Create Server.
- If the server requires authentication and you haven’t authenticated, the MCP server will show a yellow “Auth Required” badge. If you want to authenticate the MCP server, click the More button (the three dots) and choose Authenticate.
mcpServers config JSON.
- Go to Settings → MCP Servers.
- Click Add → Paste JSON.
- Paste your JSON.
Headers and manual OAuth configuration
You can configure remote MCP servers with a few configuration options:- Headers
- Client ID
- Client Secret
- Redirect port
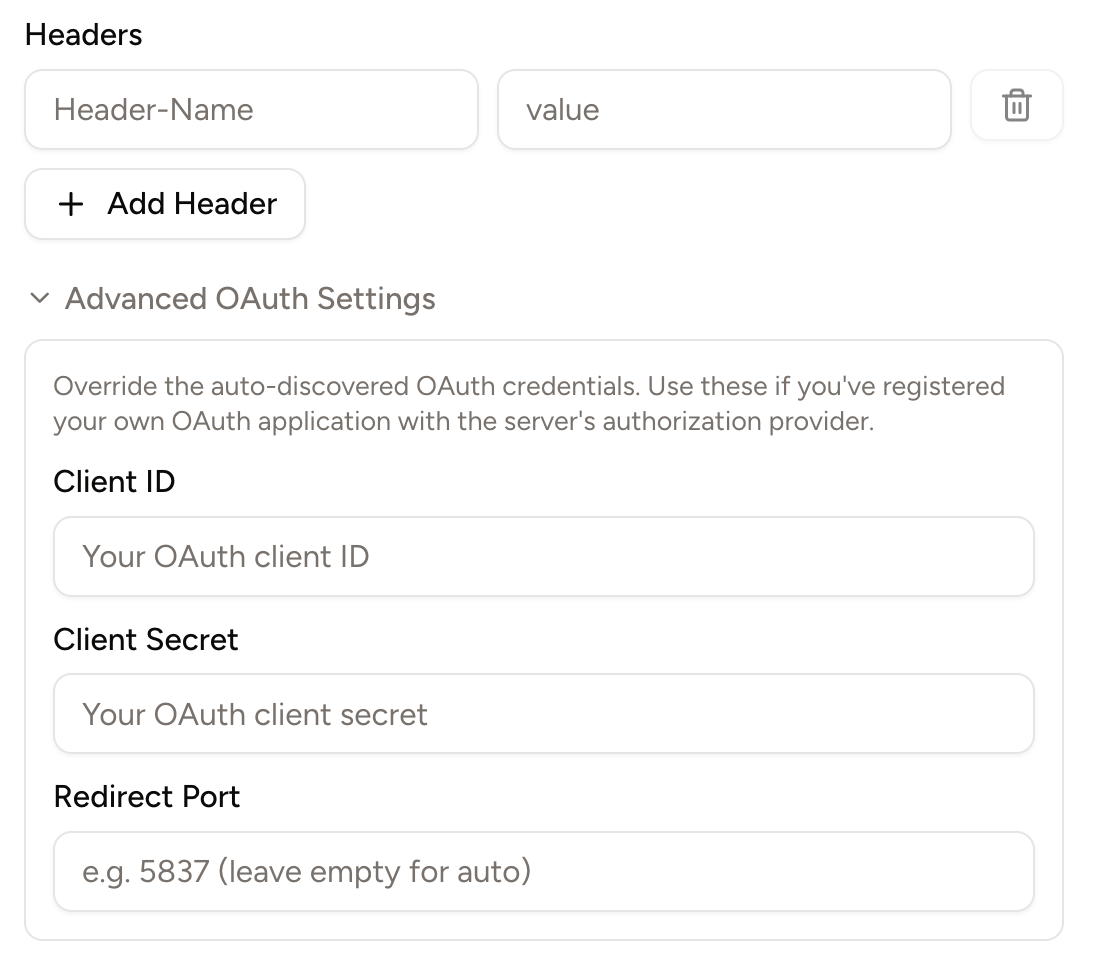
Customizing redirect port
By default, when a user signs into an MCP server with OAuth (e.g. GitHub, Figma, or Notion), Piebald automatically starts up and redirects you to a local, temporary web server on a random port (e.g.,localhost:4294, localhost:10586, etc.). This web server is stopped once the authentication process is complete.
Some apps, however, like Slack, require the redirect URL to be explicitly entered into their configuration UI. In such cases, you can’t use a localhost URL with a random port since the URL must be fixed, so you can configure a static redirect port like 12345 in the Redirect Port box, and then you can safely enter localhost:12345 in the app’s configuration UI.